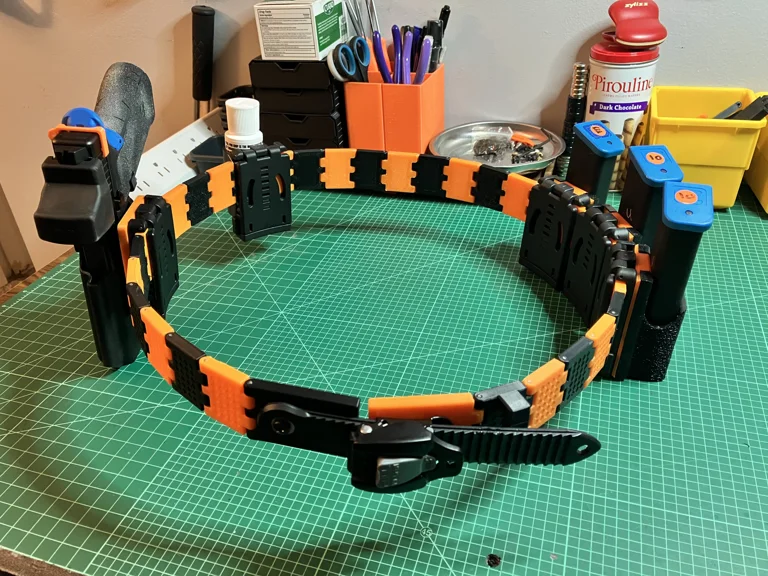
This is a 1.5 inch IDPA focused gun belt you can put together at home with your 3D printer, some metal pins from Amazon, and a $20 ratchet belt kit from BSPS. IDPA rules (as of 2026) say no bigger than 1.75 inches x 5/16 inches and this belt fits comfortably within those rules.
*--My links are not compatible with DAA Lynx links - the roll pin hole is too small and they are not dimensionally the same. DAA Lynx = 8.56mm x 38.45mm x 39.71mm and they use a M3 sized pin. This belt uses M2 sized pins and the dimensions are smaller in every way. The DAA Lynx is designed as an inner / outer belt system while my belt is designed to be a single belt system--*
Check out my (magical) magnetic magazine holsters I made to go with this belt - LINK
*--Stuff you need to make it--*
25+ X M2x35MM roll pins / pins - I got mine from Amazon in a 50 pack for 8 dollars USD in Jan 2026. Excel brand but any of them should work. I ended up using 29 on my belt - LINK
1 x DAA Ratcheting Belt Kit - I got mine at BSPS but you can find them on a bunch of other websites too - LINK
1 x 1/16th punch or similar sized tool - punch pins in / punch pins out.
1 x Lubrication - Dealer's choice here. I found in testing this in the real world at matches that lubricating the space between each link makes the belt more "belt" like and easier to put on / adjust when wearing it.
*--How many links do you need?--*
Best thing to do is just measure your current belt and figure out exactly where it overlaps when it's at your desired tension. Convert that length to MM and then add divide by 36.53. This will give you your base count. You need to be aware of pitch as the CAD dimensions vs actual dimensions are different.
As an example: I wear a 36 in some pants and a 38 in others. I ended up measuring the need for 28ish + 2 ratchet ends but in reality needed 32 + 2 ratchet ends. I printed in batches of 6 and have some left over if any of my current links break. The discrepency of my count was due to pitch on the belt once the links started to curl around my hips.
*--Link Types--*
1) Base links - Normal connecting links
2) Half Links - Normal connecting links but half-ish sized
3) Belt Keeper Links - Links to hold the excess ratchet strap so its not sticking out
4) Loop Links - Links to attach a carabiner to your belt (
5) Ratchet Strap Links - Links to attach the ratchet strap / ratchet strap clip.
*--Putting it together--*
0) One side of the 3 prong end is reduced. That is the bottom. You can put a 1/16th inch punch in there if you need to pop the pin out for whatever reason.
1) Put the links together reduced side facing down. Insert the pin and hammer away until flush with the top of the links.
2) Using a 1/16th inch punch, lightly tap until fully seated against the reduced end.
3) Repeat until your belt is put together how you like.
*--Be aware of shrink. On my printer, the orange links came out quite a bit tighter than black did so I ended up having to convince them into the hole. Print some test links beforehand and run a pin through them--*
To remove pins, stick the punch in the bottom reduced size end and punch up. It will be a tight fit or too small depending on your printer tolerances but it's over-reduced on purpose so don't be afraid to hollow it out a little bit.
*--Printing it--*
6 x 6 x 6 walls, 100% infill / 0.12 layer height / Black & Orange Overture PETG
*--UPDATES--*
This is on V4 now - I have tweaked the links for strength, ease of installation, and ease of maintenance. The circle holes are now diamonds. The links are easier to remove. All around a better belt
I have used my current belt now at almost 10 matches. It is working great - no breakage, no pin walking, and works just like you'd expect / hope.
Printables Tags: link; holster; belt; glock; ipsc; guns; links; uspsa; idpa