*Summary*
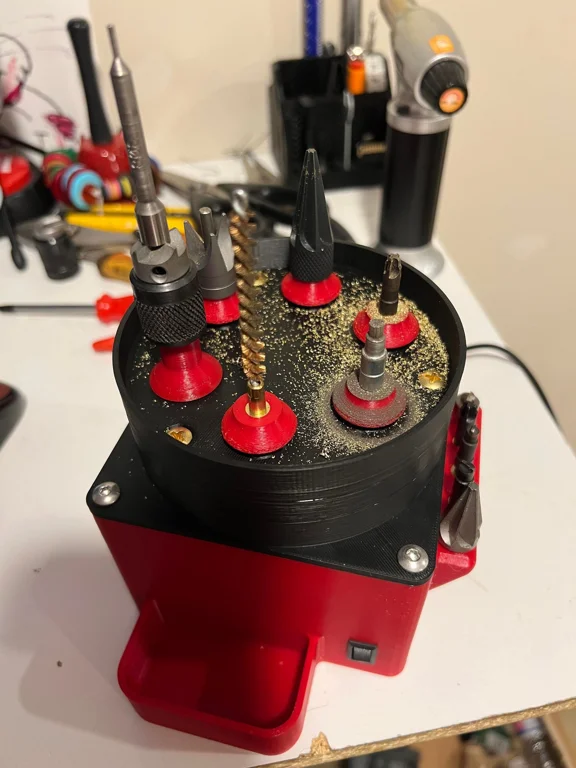
Brass Prep Station
For the gear box plates, recommend a 20% infill and 3-4 perimeters or walls.
For the gears (main helical gear and small helical gears), 4 perimeters and 70% infill plus 5 top and bottom layers.
For the housing 2-3 perimeters and 20% infill is a-ok.
For the tool posts, 4 perimeters.
For the gear shafts, 4 perimeters.
I included two types of tool posts, the main tools posts for the 8-32 ez-look inserts and then the “hex” tool post which you can insert a ¼" drive hex bit into.
There are two gearboxes you can print:
a 400RPM gearbox
and a 250RPM gearbox
I highly recommend the 250RPM gearbox as it is quite a bit higher in torque.
Anything marked with a X6 you will need to print 6 of.
*This is the parts list needed:*
https://www.amazon.ca/gp/product/B071GTTSV3/ - 12v 200 RPM Greartisan style motor with 31mm bolt circumference.
https://www.amazon.ca/gp/product/B09HV9HZQ6 - The bearings are 22OD X 8MM ID X 7MM thick skate board bearings, you need 12 of them.
https://www.amazon.ca/gp/product/B08334N261/ - This the main gear hub for connecting the hub to the motor. You need 1 of these.
https://www.amazon.ca/gp/product/B081YGD8LY/ - This is the fan I used, it is a 60x60mm x 15mm thick fan with a 50mm bolt offset pattern. It is a 12v fan.
https://www.amazon.ca/gp/product/B07T1W7S1C/ - This is the power supply I used. 12v 2a power supply with adapter. The housing is designed specifically for this adapter to fit in to the case so it's plug and play.
https://www.amazon.ca/gp/product/B083ZDFYKT/ - I used the m5 inserts out of this kit to bolt the gear box to the main housing.
https://www.amazon.com/dp/B08P1SKYCB - I used these 8-32 brass inserts for the tool posts. The part number from EZ-LOK is FL-832-HI.
The Switch is a 8mm X 14mm micro switch but you could modify the box to fit a bigger one if needed.
You will also need:
6 - M3x0.5 thread pitch bolts for the motor.
2-4 - M3x0.5 thread pitch bolts coupler to main gear
2-4 - M3x0.5 thread pitch nuts for the coupler to main gear
4 - M5x0.8 thread pitch bolts to bolt the main housing to the gear box
3 - M5x0.8 x 30mm tapered head bolts to hold the gear housing together.
3 - M5x0.8 lock nuts
In lieu of the last two bits of hardware (3xM5 bolts and nuts) you can use 10-24x1.5" bolts and nuts.
The fan came with hardware for me but you'd posisbly need 4 bolts for that too.
Happy printing!!!
*Print Settings*
*Printer:*
Mk3S
*Supports:*
Doesn't Matter
*Resolution:*
0.2mm for everything
*Infill:*
20-70% depending on the part
*Filament brand:*
ESUN and Overture
*Filament material:*
PLA
*Notes:*
You may need support for the gear shafts, and the housing for the fan vent holes. Otherwise it's all print and install.
*Post-Printing*
You may need to adjust some of the part fitment to get it all to go together as each printer will vary.
Printables Tags: lee; rcbs; reloading